
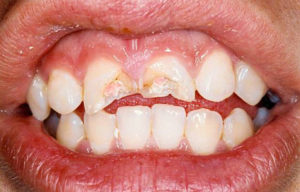
Figure 1: Class IV fractures involve the pulp
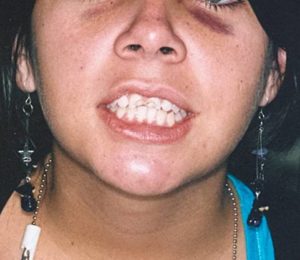
Figure 2: The patient presented to the office after accident
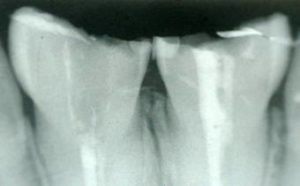 Figure 3: Radiographic examination revealed a
fracture slightly above the osseous crest.
TREATMENT
The treatment plan of choice was to restore the class IV fractures with direct resin composite, prefabricated post (Fig. 4), and fiber-reinforced composite (Fig. 5).
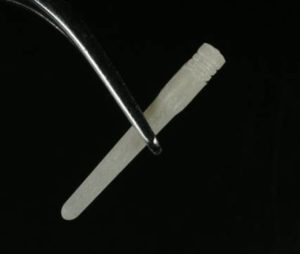
Figure 4: Prefabricated post
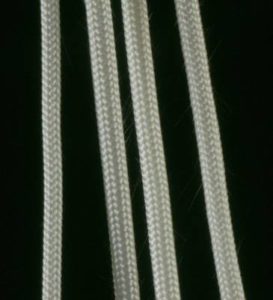
Figure 5: Glass Fiber reinforcing rope (GlasSpan)
After the endodontic therapy on the compromised teeth , the dentinal walls were cleaned using a rotary reamer, making sure to remove all filling material and sealer. (Fig. 6).
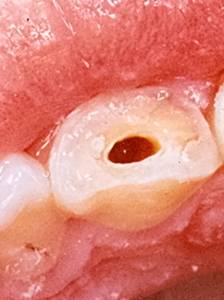 Figure 6: Dentinal walls were cleaned
Preparation of the rope
1. The glass fiber- reinforcing rope was selected, choosing a medium rope. Then the fiber was measured (Fig. 6)
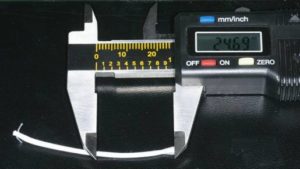
Figure 6: FR was measured
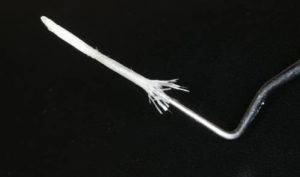
Figure 7: Aplication of flowable composite
4. A point was created with a bur ( 6885 Brasseler) (Fig. 8)
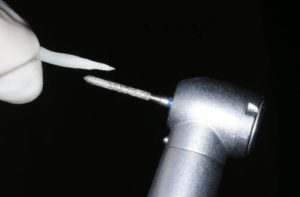
Figure 8: Creation of a point in the glass fiber- reinforcing rope
5. An instrument similar to an endodontic plugger was introduced into the hollow of the rope and then a light layer of autopolimerizing resin composite cement was applied. (Fig. 9)
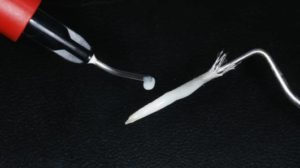
Figure 9: Applying composite cement
Cementation
For the cementation of the prefabricated post and the glass, fiber autopolimerizing resin composite cement was used and sixth-generation bonding agent with a self-etching primer. (Fig. 10)
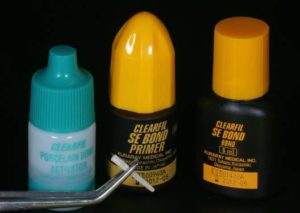
Figure 10: Sixth-generation bonding
A Centrix syringe was used to inject a dual cured resin cement composite in the root canal space. After that, the prefabricated post was pushed into place and, holding it still, the glass fiber- reinforcing rope was introduced into the mesial space using an instrument similar to an endodontic plugger until it fits.
When the glass fiber- reinforcing rope was in it´s place the instrument was taken out and with a needle tip dispenser the flowable resin composite ws injected into the hollow end of the rope until it was completely full. (Fig. 11)
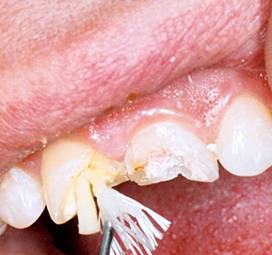
Figure 11: Injecting the flowable composite into the rope
The needle was taken out and flowable resin composite was applied around both reinforcing structures (Fig. 12), curing with the polymerization light for sixty seconds.
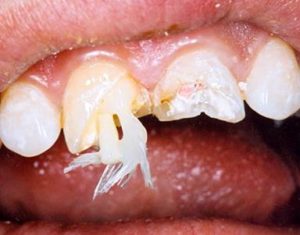
Figure 12: Post and FRC form a new substructure
Bonding and procedure
Free-hand bonding gave us absolute control over each restorative step . To sculpt composites into a precise anatomic form relies on the artistic eye of the clinician.
A scalloped bevel on the chamfer was placed to break up the straight chamfer line with a long tapered diamond. After that a self-etching primer was applied to all the surface of the coronary remainder.
The material used was the Empress Direct (Vivadent), GC Kalore (GC America) and others such as Gradia (GC America). Also tints and opaquers. (Fig. 13)
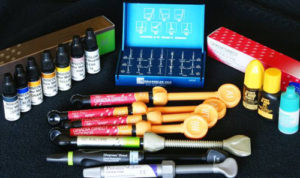 Figure 13: Part of the armamentarium
The initial layer in palatal wall with an opaque composite resin (Microhybrid) was applied. The artificial dentin was built up in small increments; each increment was polymerized for 20 seconds. (Fig. 14)
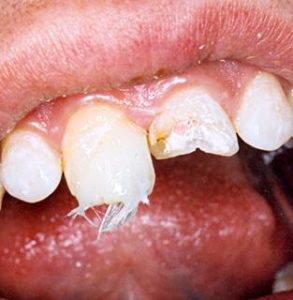
Figure 14: Resin composite shade AO2 was applied
Microhybrid was not applied into incisal to achieve translucency in that area. (Fig. 24).
Because the fracture extended beneath the gum tissue, it was necessary to remove it with electrosurgery so that the fracture line was exposed. (Fig. 15)
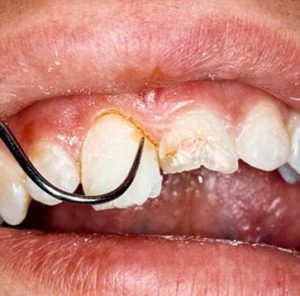 Figure 15: Tissue removal using electrosurgery unit
To camouflage the fracture line, a thin layer of XWB shade of resin (Gradia) was applied. Then an homogeneous layer of BW shade of resin (Gradia) was applied to all the structure. (Fig 16)
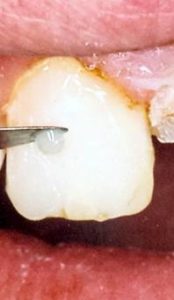
Figure 16: Camouflaging the fracture line
This case required multiple layers of microfill composite to recreate the artificial enamel. We selected shade A1, B1 (IPS Empress Direct and Kalore) for the surface. To contour each layer we used a metal-blanded instrument, evaluating each combination of shades with the reference teeth.
The two teeth were completed in general shape, and then the incisors were cut back to create developmental embrasures; mamelons were also created.
All teeth had a final layer of WT (Gradia) and clear translucent CT (Gradia) composite shade, sculpted using a thin metal-blanded instrument and light cured.
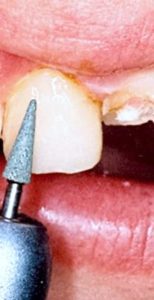
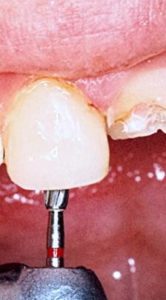 Figure 18: Lingual contouring
The facial surface was sculpted with finishing burs (Composite and Polishing Kit – Brasseler). A metal diamond-coated strip was used to remove the slight excess of composite in the proximal areas. (Fig. 19)
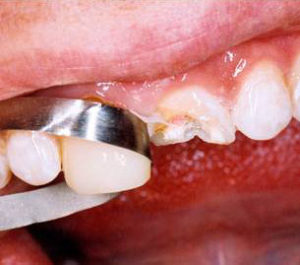 Figure: 19 Removing excess composite
The gingival margin was thinned with an eight fluted Brasseler carbide bur. The proximal, facial, and incisal angles were finished using the Super-Snap Rainbow Kit Polishing System. The disks were used sequentially according to grit, ranging from coarse to extra fine. The finest of the four grits of polishing strips is shown. (Fig. 20) The same procedure is done on tooth 9.
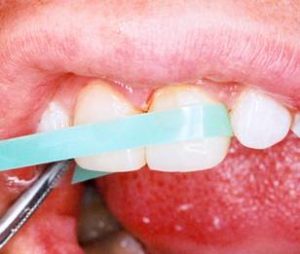
Figure 20: Interproximal area is polished with polishing strips
Figure: 21 Primary anatomy
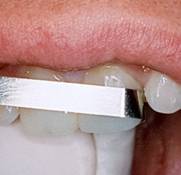
Figure 22: Polishing
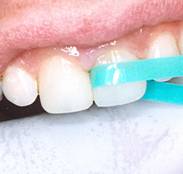
Figure 22: Polishing

Figure 24: Final gloss
After evaluating the result with a series of photographs we asked ourselves the following question: Do we love the contours? Focusing on the anatomy the answer was no. So we decided that this step was incomplete and improved the contour and accentuated the mamelons. Also the surface characterization was reevaluated in order to improve the chromatic appeareance of the restorations.
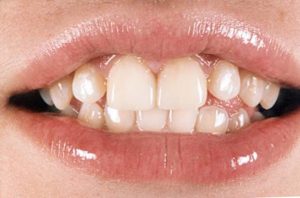
Figure 26: Secondary anatomy
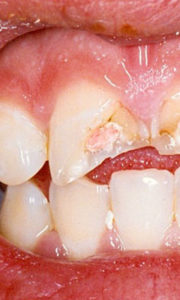
Figure: 27 Before

Figure 28: Third anatomy. Microscopic evaluation
Notice the natural-looking restorations with surface morphologic characterizations. The micro and macro textures give the restorations extremely good light transmission properties. The tiny grooves and the lobes simultaneously present optimize reflection and refraction.
The final result is demonstrated in Figure 33. Compare with Figure 29 that shows how the teenager presented to consultation.
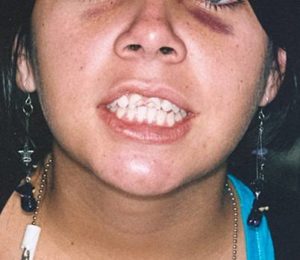
Figure 29: Full face; fractured upper left and right central incisor
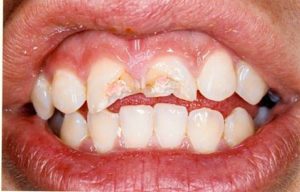
Figure 30: Close up fractured upper left and right central incisor
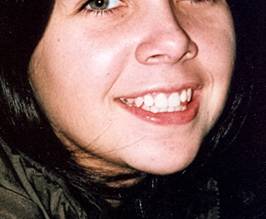
Figure 31: Lateral right view
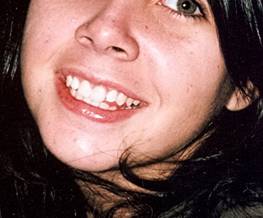
Figure 32: Lateral left view
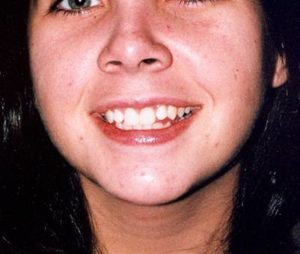
Figure 33: Restored smile
